Scientific Solutions

Filter

Showing 49–72 of 89 results

  • Buehler – Wilson VH3100 Automated Hardness Testing System

    Buehler – Wilson VH3100 Automated Hardness Testing System

    Designed to provide a fully automated, dedicated, and lean hardness tester, the Wilson VH3100 is the workhorse of the VH3000 series. Featuring a load cell range of 0.05-10kgf and 3-position virtual turret, this system significantly reduces complex…

    Designed to provide a fully automated, dedicated, and lean hardness tester, the Wilson VH3100 is the workhorse of the VH3000 series. Featuring a load cell range of 0.05-10kgf and 3-position virtual turret, this system significantly reduces complexity by aligning its indenter, objectives, and overview camera at a fixed location. Configured with DiaMet software, maximize precision, and minimize your time with the VH3100 hardness tester.

  • Buehler – Wilson VH3300 Automated Hardness Testing System

    Buehler – Wilson VH3300 Automated Hardness Testing System

    This Wilson VH3300 fully automated hardness tester provides an integrated system for your complete range of applications. Its fast, six position turret accommodates a three-indenter design with a configurable load range of 10gf to 50kgf of force a…

    This Wilson VH3300 fully automated hardness tester provides an integrated system for your complete range of applications. Its fast, six position turret accommodates a three-indenter design with a configurable load range of 10gf to 50kgf of force and optional overview optics. Paired with DiaMet Software, the VH3300 is built to meet your application needs today, tomorrow, and into the future.

  • Eagle Vision - 360Ëš Can Inspection System

    Eagle Vision – 360Ëš Can Inspection System

    The 360° Can Inspection module is a highly accurate Mix-Up & Integrity Detection system for cans. The system integrates critical functionalities including (Bar- & DMC- & QR-) Code reading and Color Artwork & Damages inspection in …

    The 360° Can Inspection module is a highly accurate Mix-Up & Integrity Detection system for cans. The system integrates critical functionalities including (Bar- & DMC- & QR-) Code reading and Color Artwork & Damages inspection in one “all-in-one” system.

  • Eagle Vision - Code Reading Inspection

    Eagle Vision – Code Reading Inspection

    The Code Reading module inspects ink-jet, laser and thermotransfer codes on various packaging types, including (infant formula) cans, beverage cans, labels, carton and PET bottles. The Code Reading module checks if codes are present, complete, rea…

    The Code Reading module inspects ink-jet, laser and thermotransfer codes on various packaging types, including (infant formula) cans, beverage cans, labels, carton and PET bottles. The Code Reading module checks if codes are present, complete, readable or correct.

  • Eagle Vision - Empty Can Inspection

    Eagle Vision – Empty Can Inspection

    The Empty Can Inspection system is able to detect defects quickly and accurate on the flange, bottom and the inner sidewalls of the can. Pollution and spots inside, as well as flange dents, flange width and ovality/roundness are being inspected. T…

    The Empty Can Inspection system is able to detect defects quickly and accurate on the flange, bottom and the inner sidewalls of the can. Pollution and spots inside, as well as flange dents, flange width and ovality/roundness are being inspected. The Empty Can Inspection system is available for high speeds.The system is compact and can easily be installed on both existing and new lines.

  • Eagle Vision - In Line Seam Inspection

    Eagle Vision – In Line Seam Inspection

    The Seam Inspection module inspects the complete seam around the can. The module is positioned in-line to inspect 100% of the produced cans, non-destructively.

    The in-line Seam Inspection module inspect…

    The Seam Inspection module inspects the complete seam around the can. The module is positioned in-line to inspect 100% of the produced cans, non-destructively.

    The in-line Seam Inspection module inspects the complete seam around the can. The module is positioned in-line to inspect 100% of the produced cans, non-destructively. Various can sizes and can shapes are inspected without any product handling. The inspection is available for high line speeds.

  • ICSPI - Redux AFM

    ICSPI – Redux AFM

    Effortlessly collect 3D topography data with sub-nanometer precision on your benchtop with the Redux AFM. Get quantitative data in minutes for topography, roughness, film thickness, particle size and more.

      Effortlessly collect 3D topography data with sub-nanometer precision on your benchtop with the Redux AFM. Get quantitative data in minutes for topography, roughness, film thickness, particle size and more.

      • Precise: Quantitative 3D data with sub-nanometer precision
      • Automated: Motorized X, Y and Z stages for easy sample navigation
      • High throughput: Go from sample loading to data in minutes
      • Versatile: Topography, roughness, thickness, particle size and more
  • ICSPI – Atomic Force Microscope

    ICSPI – Atomic Force Microscope

    ICSPI has integrated all of the components of a traditional AFM onto a single 1 mm x 1 mm chip to create the world’s first single-chip AFM. That means that 250 AFMs can fit on the face of a penny.

    The…

    ICSPI has integrated all of the components of a traditional AFM onto a single 1 mm x 1 mm chip to create the world’s first single-chip AFM. That means that 250 AFMs can fit on the face of a penny.

    The nGauge AFM uses micro-electro-mechanical systems (MEMS) to control the X, Y and Z position of the tip. This means that no alignment of lasers is required.

    The nGauge is the smallest AFM in the world. Because the entire unit weighs less than 500 grams, the nGauge rejects building vibrations, so no vibration isolation table is needed, which makes the nGauge a true benchtop AFM.

  • LUM GmbH - LUMiFlector

    LUM GmbH – LUMiFlector

    The LUMiFlector® is a powerful measuring instrument for product parameter determination & monitoring. The innovative patented MRS-Technology® is the core of the instrument. It quantifies parameters of manifold products â…

    The LUMiFlector® is a powerful measuring instrument for product parameter determination & monitoring. The innovative patented MRS-Technology® is the core of the instrument. It quantifies parameters of manifold products – no sample preparation, no chemicals.

    The At-line instrument is designed for process monitoring or quality control on a production site or in a laboratory. With its small footprint it can be easily placed beside the production line or in a QA/QC laboratory. The LUMiFlector® Lab is consumable free: no chemicals, no additional waste, no additional costs.

    Application fields include food, feed, pharmaceutical, biotechnology products and medical nutrition and beyond.

    The optical interface is easily accessible and easy to clean, with just water and soap. The instrument comes with a self-explaining user-friendly interface only. A short training of the operator is sufficient, no need for complicated or time-consuming training. With just approximately 20 seconds per measurement, the LUMiFlector® saves your valuable time. Easy cleaning, handling, measurement, installation & operation guaranteed.

  • LUM GmbH - LUMiFrac

    LUM GmbH – LUMiFrac

    The LUMiFrac is an innovative adhesion analyser, which employs centrifugal forces to determine temperature-controlled tensile as well as shear strength.

    It employs centrifugal forces to stress multiple …

    The LUMiFrac is an innovative adhesion analyser, which employs centrifugal forces to determine temperature-controlled tensile as well as shear strength.

    It employs centrifugal forces to stress multiple samples at once. It provides adhesive and tensile strength as well as shear strength as an absolute physical quantity in N/mm² (MPa).

    The LUMiFrac accomplishes this by directly applying an incrementally increasing centrifugal force to the specimen being tested. It determines with high resolution the RPM at the moment of fracturing (employing Centrifugal Adhesion Testing Technology).

    All data is transmitted to the well-known and popular operating software SEPView, which automatically calculates and displays the critical force/strength of failure in real time. Furthermore, it allows to analyze, compare & calculate statistics and combine results for up to tens of samples. Related data, as figures of fracture pattern, may be taken into account as well.

  • LUM GmbH - LUMiFuge

    LUM GmbH – LUMiFuge

    The LUMiFuge is an analytical centrifuge that measures instantaneously the extinction of transmitted light across the full length of your sample using the STEP-Technology. It is the only instrument in the world that enables you to perform physical…

    The LUMiFuge is an analytical centrifuge that measures instantaneously the extinction of transmitted light across the full length of your sample using the STEP-Technology. It is the only instrument in the world that enables you to perform physically accelerated, direct and efficient stability testing and ranking of your formulations.

    It features an advanced optical system enabling multi-sample analysis at user defined speeds, light intensities and temperatures. The optical blocks consist of high-powered special light sources of different wavelengths.

    The parallel light illuminates the whole sample from top to bottom. Even the smallest changes across the entire sample height are detected by a sensor featuring high optical and spatial resolution. Immediate data collection ensures the ability to measure everything that occurs in your sample; no matter how simple or complex. There is no need to dilute or to know any material constants; just input your samples and you have your results.

    By looking at the fingerprint patterns of the whole sample, you can classify and understand the causes of instability, e. g. creaming, sedimentation or flocculation, as well as measure and rank stability.

    Use this knowledge to develop new formulations and optimize current ones easily.

  • LUM GmbH - LUMiSizer

    LUM GmbH – LUMiSizer

    The LUMiSizer is an evolutionary development based on the LUMiFuge platform with some significant additional capabilities that instantaneously measures the extinction (space- and time-resolved) of the transmitted light across the entire length of …

    The LUMiSizer is an evolutionary development based on the LUMiFuge platform with some significant additional capabilities that instantaneously measures the extinction (space- and time-resolved) of the transmitted light across the entire length of your sample using the STEP-Technology.


    Because of an enhanced optical system, the LUMiSizer lets you analyse particle and droplet velocity distributions for creaming and sedimentation phenomena without the need of any material data and performs particle sizing (ISO 13318- 2).

  • LUM GmbH - LUMiSpoc

    LUM GmbH – LUMiSpoc

    The LUMiSpoc® is a highly advanced single particle analysis system, similar to a flow cytometer, that measures particle size distribution and particle concentration of nano- and microparticles in suspensions and emulsions with…

    The LUMiSpoc® is a highly advanced single particle analysis system, similar to a flow cytometer, that measures particle size distribution and particle concentration of nano- and microparticles in suspensions and emulsions with an unparalleled resolution and dynamic range.

    The instrument uses the patented Single Particle Light-Scattering Technology® , a technology which records light that is scattered into into forward and sideward directions by single nano- and micro particles while passing a laser beam of a special beam cross-section.

    It enables you to get a deep insight into complex nano- and submicro-particulate systems, which helps you to design tailored particles and dispersions.

  • LUM GmbH - Material Characterization - LUMiReader and LUMiReader PSA

    LUM GmbH – Material Characterization – LUMiReader and LUMiReader PSA

    The LUMiReader instantaneously measures the extinction profile of the transmitted light across the entire length of your sample. Each LUMiReader contains an optical block and temperature control element, each of which can be controlled individuall…

    The LUMiReader instantaneously measures the extinction profile of the transmitted light across the entire length of your sample. Each LUMiReader contains an optical block and temperature control element, each of which can be controlled individually. This ensures maximum flexibility and accuracy.

    In addition, the specially designed PSA module also opens new horizons for high resolution particle sizing and allows you to measure the velocity distribution of separating particles. There is no need for you to know any material constants such as viscosity or density.

  • LUM GmbH - Material Characterization - LUMiReader X-Ray

    LUM GmbH – Material Characterization – LUMiReader X-Ray

    The LUMiReader X-Ray is the first dispersion analyser designed for one purpose only: to study dispersability, stability, separation, and consolidation phenomena for completely transparent to completely opaque emulsions, suspension, sludges, slurri…

    The LUMiReader X-Ray is the first dispersion analyser designed for one purpose only: to study dispersability, stability, separation, and consolidation phenomena for completely transparent to completely opaque emulsions, suspension, sludges, slurries, foams and powders in real-time. For the first time ever, illuminate your sample instantaneously from top to bottom. Solve your most challenging dispersion problems with complete insight. Go places light cannot.

  • Messmer Büchel - Burst Tester

    Messmer Büchel – Burst Tester

    The Burst Tester is used as a multi-directional test to identify failure in the direction showing least resistance. This test shows the physical strength and fiber bond. Different models are available for paper, board or textile. This instrument i…

    The Burst Tester is used as a multi-directional test to identify failure in the direction showing least resistance. This test shows the physical strength and fiber bond. Different models are available for paper, board or textile. This instrument is also used for other applications such as plastic, rubber, aluminum and felts. The sample is pneumatically clamped, the rubber membrane is pushed upwards by hydraulics. The force at fracture is recorded.

  • Messmer Büchel - Crush Tester

    Messmer Büchel – Crush Tester

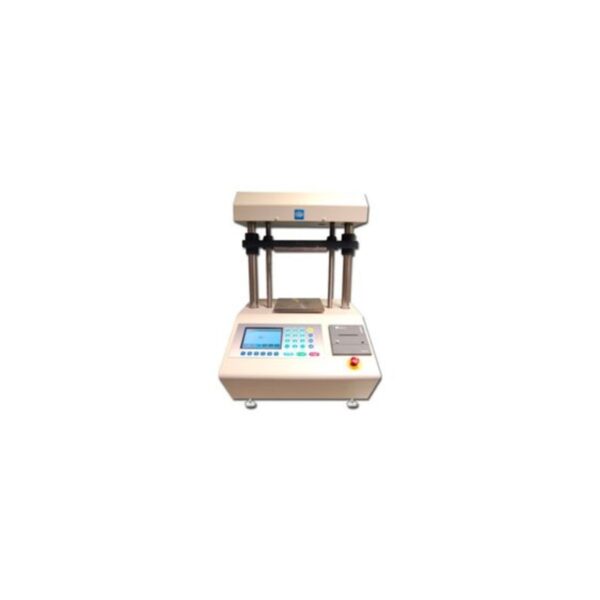
    The Crush Test is designed as a robust, easy to use instrument. Exactly what you need when performing crush tests. The Crush Tester is suitable for a wide variety of samples, including corrugated board, tubes, paper and plastics. The special sampl…

    The Crush Test is designed as a robust, easy to use instrument. Exactly what you need when performing crush tests. The Crush Tester is suitable for a wide variety of samples, including corrugated board, tubes, paper and plastics. The special sample holders extend the instrument’s possibilities. The accuracy is achieved with a precision load cell, which is even accurate at low force values.

  • Messmer Büchel - Digital Micrometer - Model 49-56

    Messmer Büchel – Digital Micrometer – Model 49-56

    The model 49-56 Digital Micrometer combines unmatched accuracy and resolution with a modern contemporary look. The Micrometer can be configured to meet ISO, ASTM, TAPPI, EDANA or other international specifications. The Micrometer offers a cantilev…

    The model 49-56 Digital Micrometer combines unmatched accuracy and resolution with a modern contemporary look. The Micrometer can be configured to meet ISO, ASTM, TAPPI, EDANA or other international specifications. The Micrometer offers a cantilever balance system to allow low pressure measurements. This feature also allows adding or removing additional weights for multiple pressure applications. The instrument is supplied with a sensing eye next to the anvil. When a sample is detected the test cycle automatically starts.

  • Messmer Büchel - Horizontal Tensile Tester - Model 84-56

    Messmer Büchel – Horizontal Tensile Tester – Model 84-56

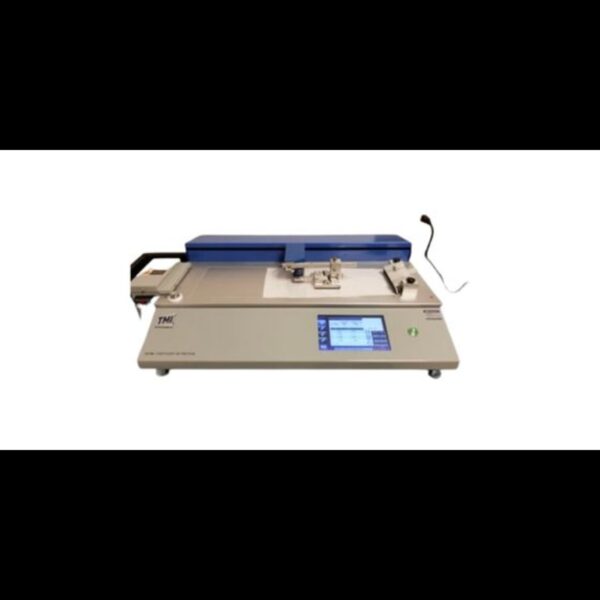
    Insert your sample and test The Horizontal Tensile Tester tests the tensile strength and elongation of a sample. After placing the sample the sensor detects the sample and the test starts. Special guides are supplied to center the sample correctly…

    Insert your sample and test The Horizontal Tensile Tester tests the tensile strength and elongation of a sample. After placing the sample the sensor detects the sample and the test starts. Special guides are supplied to center the sample correctly. The guides can be replaced when another test width is required. The wide workbench enables you to easily perform your tests. The auto detect option leaves your hands free to slide in your sample. The touchscreen has clear buttons makes navigation quick and easily. As an option, the instrument can be adapted for wet test according to ISO 12625-5. Test results After the tests the values are shown in a graph and in statistical values. The main results are force, strain, T.E.A, elongation and force, and there is a wide range of other results. The instrument is equipped with an overload protection and can be supplied with a 50, 100, 250, 500 or 1,000N load cell.

  • Messmer Büchel - Pocket Goniometer PGX+ - Model 68-76

    Messmer Büchel – Pocket Goniometer PGX+ – Model 68-76

    Small and Easy to Handle

    The PGX+ measures contact angle (dynamic and static), surface tension, and surface energy. The PGX+ makes a drop in µl according to the size that is set. The drop is automatically released and …

    Small and Easy to Handle

    The PGX+ measures contact angle (dynamic and static), surface tension, and surface energy. The PGX+ makes a drop in µl according to the size that is set. The drop is automatically released and 80 images per second are made. The instrument is used for paper & board, solar cell panels, windshields, metal cylinders and similar surfaces. For most tests deionized water is used, however using other liquids is also possible. Contact us if you want to use any other liquids.

    Test Results

    During testing the instrument is connected to the special PC software. The software gives you an easy overview of the possible tests. During the test the data transferred to the computer. The pictures taken and the results can be stored and analyzed. Thanks to the direct feedback, adjustments to improve the results can easily be made.

  • Messmer Büchel - Short Span Compression Tester (STFI) - Model 17-36

    Messmer Büchel – Short Span Compression Tester (STFI) – Model 17-36

    Compression strength

    The 17-36 Short Span Compression Tester measures the compression strength of paper and board. The distance or free span can be set from 0.3 – 0.7mm (steps of 0.1). When performing a compressio…

    Compression strength

    The 17-36 Short Span Compression Tester measures the compression strength of paper and board. The distance or free span can be set from 0.3 – 0.7mm (steps of 0.1). When performing a compression test on such a short distance the stability of the clamps and instrument is very important. The 17-36 Short Span directs all the forces of the clamped sample to the load cell, making it one of the most accurate instrument available on the market.

    Test results

    Edgewise compressive strength also referred to as Short Span Compression (SCT) was developed in 1980 as an improved method to measure buckling and compressive failures of paper and board. Short Span Compression is considered an important property and can be used to predict the performance of container board used in the manufacture of corrugated boxes.

  • Ray-Ran - 6MBA Advanced Melt Flow System

    Ray-Ran – 6MBA Advanced Melt Flow System

    The 6MBA is the basic model offered within the Ray-Ran Range of Melt Flow Indexers. The manually operated test procedure is very simple to undertake. Molten Polymer is extruded through a closely controlled orifice (die) from the apparatus using pr…

    The 6MBA is the basic model offered within the Ray-Ran Range of Melt Flow Indexers. The manually operated test procedure is very simple to undertake. Molten Polymer is extruded through a closely controlled orifice (die) from the apparatus using pre set conditions of temperature and pressure produced by a dead weight system. The extruded polymer is cut off manually and is then weighed. Using the time interval to extrude the polymer its flow rate over 10 minutes can easily be determined, thus giving the Melt Flow Index (MFI) or Melt Mass Flow Rate (MFR) in g/10 min. By conducting a simple Density Test at test temperature on the same material using the same pre set conditions and a known piston travel distance the Melt Volume Rate (MVR) can also be determined.

  • Ray-Ran - 6MPCA Advanced Melt Flow System

    Ray-Ran – 6MPCA Advanced Melt Flow System

    The 6MPCA is the most advanced model offered within the Ray-Ran Range of Melt Flow Indexers. The operating procedure is very simple to undertake using its on board advanced microprocessor technology. The large liquid crystal display (LCD) provides…

    The 6MPCA is the most advanced model offered within the Ray-Ran Range of Melt Flow Indexers. The operating procedure is very simple to undertake using its on board advanced microprocessor technology. The large liquid crystal display (LCD) provides simple on screen instructions reducing user error and the test parameters are easily entered via the alpha numeric membrane keypad. The apparatus can accurately determine results for MFR, MVR and Density at test temperature.

  • Ray-Ran - Advanced Universal Pendulum Impact Tester

    Ray-Ran – Advanced Universal Pendulum Impact Tester

    The Ray-Ran Advanced Universal Pendulum Impact Tester utilises advanced microprocessor technology to determine the energy required to break or rupture specimens such as plastics, composites, ceramics and non ferrous metals to International testing methods for Izod, Charpy and Tension Impact Testing.

    To calculate the impact energy, the apparatus uses advanced and highly accurate rotary encoder technology to record the lost angle of the hammer after impacting a test sample against the angle recorded after calibrating the hammer. The resulting lost angle is calculated as the test sample’s impact energy by the advanced microprocessor system.

    The apparatus is supplied as standard with Ray-Ran’s TechniTest Windows based PC software for connection to the apparatus via an RS232 or Ethernet connection. Test results can be printed directly from the TechniTest software or can be saved and exported as .CSV files which can be opened with Microsoft Excel in tabular form which can be manipulated to your specific requirements such as preparing a graphical presentation or copying the results to a Word document for a report presentation if required.

Delivering Growth – in Asia and Beyond

Follow Us

© DKSH International Ltd.  All Rights Reserved.

test block for Laos

Your download – just a few steps away

Please enter your details here:

test

Contact us

Contact us